


How To Make: Glitter Cup THE EASY WAY!
In today’s project, I (Lucy) am going to teach you how to make a glitter cup the easy way! I love glitter…it’s delicious…I mean..Just kidding! I absolutely love working with it and crafting with it. It’s fun! But, when doing things with glitter, I usually had to use epoxy. We do epoxy cups with glitter. They are crazy adorable and always turn out gorgeous. But epoxy is extremely hard to work with because it’s sticky, drippy, and you can mess up quite easily with it. So I came up with a different craft having to do with glitter. This is an adorable, decorative, and fabulous glitter cup. You can put one in each room, or have one in a special spot in your home. I will teach you with easy to follow directions, detailed steps, and sharing my best tips and tricks with you to help come out with the best result. Let’s get crafting!
SUPPLIES FOR THIS CRAFT:
Glass cup or container (We got ours at the dollar store! Guess how much it was! a dollar. Wow, good joke, mom)
Glitter
Mod Podge
Little Foam Paintbrush
Isopropyl Alcohol
Paper Towel

Supplies for this craft

Step 1: Wipe down the inside of the cup. Use your Isopropyl alcohol and paper towel to wipe down the entire inside of the cup. You can also do the outside if you'd like. This helps for the mod podge and the glitter to stick better. Also, it gets rid of marks and dirt that you don’t want to mod podge in permanently.

Step 2: Now, we can mod podge our first layer onto the cup. We like to take a small amount of mod podge and pour it into the lid. This way, we don’t use an excessive amount of the glue. Take your small foam brush and dip it into the lid. Then, apply a thin layer of it to the inside of the cup.

Step 3: Glitter time! Take your glitter and pour a generous amount onto the bottom of the glass (just enough for it to cover the whole inside of the cup) Next, take your palm and cover the whole top of the cup. Shake it well making sure the glitter covers the entire interior.
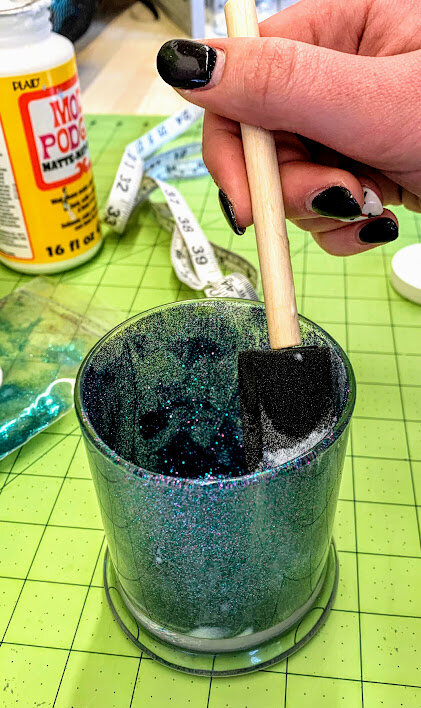
Step 4: You will need to put a second coat on the inside. Just use your small foam paint brush and lightly brush the inside with mod podge. (be sure to brush really lightly because we don’t want a ton of glitter falling off) Make sure the bottom is covered. Next, just like you did last coat, pour a generous amount of glitter to the bottom and shake it with your hand closing the top. Making sure to coat every spot.

Here is our final result! We think that it turned out beautiful! What do you think? We used a gorgeous glitter called sea nymph and we think it suits it fabulously.
Thank you for crafting with us today! We hope you enjoyed this fun, easy to make, gorgeous cup! Ours turned out amazing! Tell us how yours went! Leave us a comment down below telling us how you did. Also, please consider subscribing so we can keep in touch and we can do more fun crafts together. It’s completely FREE! Thanks for crafting!
Blessings,
~ Lucy (Founder)


